

Corporate Theme is inspired by Wordpress Corporate Themes which is designed by StudioPress and Make it possible to blogger by Bloggerceria. Corporate themes come with 2 columns, slider top, right sidebar, and embedded 3 columns footer section. I've modified this template and now you don't need to upload any javascript code to your own web hosting since it's already built in. You may look the demo and download it. Enjoy.
Preview | Download

Showing posts with label 2 Columns. Show all posts
Showing posts with label 2 Columns. Show all posts
Sep 30, 2009
Corporate Theme Magazine Blogger template

Sep 11, 2009
Jynxed Unique Design Blogger Template
Jynxed is a unique template originally designed for wordpress theme by forthelose and has been converted to blogger by wpbloggerthemes. Jynxed has Unique web 2.0 feel. Jynxed template come with 2 columns and right sidebar. just Take a look to the demo to see the it live.
Preview | Download
Go here for your Basic Installation of blogger template.
Aug 28, 2009
Premium Dashboard Professional Magazine Style
Premium Blogger Dashboard is professional template made it by SAER. Premium Dashboard is another professional magazine style template for blogger and come with 2 columns and right sidebar. It has many beautiful functions ! the first on is the rounded menu navigation on the top of the featured post and the search bar. The second function is the automatic read more. another great function which is has related post widget.
Preview | Download
Basic Installation
Menu Navigations, change the links to your needed links.
<ul>
<li class='current_page'><a expr:href='data:blog.homepageUrl' title='Home'><span>Home</span></a></li>
<li><a href='http://blogger-dashboard.blogspot.com/search/label/Blogger%20Templates' title='Blogger Templates'><span>Blogger Templates</span></a></li>
<li><a href='http://blogger-dashboard.blogspot.com/search/label/Blogger%20Tutorial' title='Blogger Tutorial'><span>Blogger Tutorial</span></a></li>
<li><a href='http://blogger-dashboard.blogspot.com/search/label/Twitter%20Tips' title='Twitter Tips'><span>Twitter Tips</span></a></li>
<li><a href='http://blogger-dashboard.blogspot.com/search/label/SEO%20Tips%20and%20Tricks' title='SEO TIPS'><span>SEO TIPS</span></a></li>
<li><a expr:href='data:blog.homepageUrl + "feeds/posts/default"' title='Posts RSS'><span>Posts RSS</span></a></li>
<li><a expr:href='data:blog.homepageUrl + "feeds/comments/default"' title='Comments RSS'><span>Comments RSS</span></a></li>
<li><a href='http://www.blogger.com' title='Login'><span>Login</span></a></li>
</ul>
Subscription widget

<a href="http://feeds.feedburner.com/BloggerDashboard"><img alt="feedburner" style="border: 0pt none ; margin-top: 15px;" src="http://lh4.ggpht.com/_9b1traaMESE/SmDYssZpwFI/AAAAAAAAALs/g17Vr4lP_sY/Rss%20feeds%20icon%203222.png"/></a><!-- AddThis Button BEGIN -->
<div expr:addthis:url="data:post.url" class="addthis_toolbox addthis_default_style" expr:addthis:title="data:post.title"><a share="[object Object]" class="addthis_button_compact at300m" href="http://www.addthis.com/bookmark.php?v=250&pub=saer_gh" ost="1" conf="[object Object]"><span class="at300bs at15t_compact"></span>Share</a> <span class="addthis_separator">|</span> <a share="[object Object]" class="addthis_button_facebook at300b" ost="1" conf="[object Object]" title="Send to Facebook"><span class="at300bs at15t_facebook"></span></a><a share="[object Object]" class="addthis_button_myspace at300b" ost="1" conf="[object Object]" title="Send to MySpace"><span class="at300bs at15t_myspace"></span></a><a share="[object Object]" class="addthis_button_google at300b" ost="1" conf="[object Object]" title="Send to Google"><span class="at300bs at15t_google"></span></a><a share="[object Object]" class="addthis_button_twitter at300b" ost="1" conf="[object Object]" title="Tweet This"><span class="at300bs at15t_twitter"></span></a><script src="http://s7.addthis.com/js/250/addthis_widget.js?pub=saer_gh" type="text/javascript"></script><!-- AddThis Button END --><a alt="Subscribe using any feed reader!" href="http://www.addthis.com/feed.php?pub=saer_gh&h1=http%3A%2F%2Fblogger-dashboard.blogspot.com%2Ffeeds%2Fposts%2Fdefault&t1=" target="_blank" onclick="return addthis_open(this, 'feed', 'http://blogger-dashboard.blogspot.com/feeds/posts/default')"><img style="border-right-width: 0px; border-top-width: 0px; border-bottom-width: 0px; border-left-width: 0px" alt="Subscribe" width="125" src="http://s7.addthis.com/static/btn/lg-feed-2-en.gif" height="16"/></a><script src="http://s7.addthis.com/js/250/addthis_widget.js?pub=saer_gh" type="text/javascript"></script></div>
Change the red code to your feedburner ID.
If you have another problem, contact the author here. Enjoy.
Aug 16, 2009
MobiPress Professional Magazine Template
MobiPress is designed by Jinsona. And, it has been converted by CahayaBiru.com. MobiPress is Stylist blue, white, and grey color template. Its design will attract another blogger to come to your blog. Equipping with welcoming sentence, mobipress is a right choice for you to reach another excitement.
Preview | Download
Installations :
Change MobiPress LOGO
Find code below and change it wiyh your own logo image URL
https://blogger.googleusercontent.com/img/b/R29vZ2xl/AVvXsEiCCaNTkuHzna0Uzn1MiiGd1m2uLY2oKkLA0BvB_W3R3bVgUfbOs_0otXplqn1Sb2moM7WP7bpX1QKFlUnznNX0EhChhPJM0YNKcyH4CfRGsho4s-av0k2AIEJUuG8x742XBPiCTOXNwuM/s1600/logo.jpg
Setting First Menu
Find code below
<li><a href='#'>Title Here</a></li>
<li><a href='#'>Title Here</a></li>
<li><a href='#'>Title Here</a></li>
<li><a href='#'>Title Here</a></li>
<li><a href='#'>Title Here</a></li>
Change # and Title Here with your own preferred url and title.
Second Menu
find code below and change it with your own.
<li><a href='PARENT-LINK-ADDRESS'>PARENT TITLE</a>
<li><a href='PARENT-LINK-ADDRESS'>PARENT TITLE</a>
<li><a href='PARENT-LINK-ADDRESS'>PARENT TITLE</a>
<li><a href='PARENT-LINK-ADDRESS'>PARENT TITLE</a>
<li><a href='PARENT-LINK-ADDRESS'>PARENT TITLE</a>
<li><a href='PARENT-LINK-ADDRESS'>PARENT TITLE</a>
Setting Twitter
Find code below
TWITTER-ID-TWITTER
change it with your own twitter id.
Aug 15, 2009
Magzmo Black Magazine Template
Magzmo Black Magazine Template is new template designed and bloggerized by Subagya. Magzmo black come with 2 columns with magazine style. The top gallery slide show just below header. Also this template is fully widgetized and built in many possible position for your ads spot. The color is simple white, black and gray.
Features :
1. Magazine style
2. S3slider images show
3. 2 column header section
4. 3 column footer section
5. Search bar
6. Intergrated auto read more scripts
7. Navbar
8. Split column in sidebar
9. Adsense ready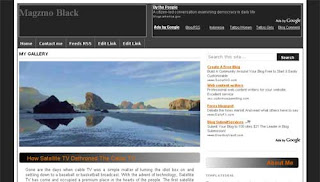
Preview | Download
Jul 27, 2009
The Latest Theme Minimalist Magazine Style
Now it's time to add new magazine template. I was searching through the web and find this minimalist gallery style blogger template. The template called "The Latest Theme". It was originally a wordpress theme designed by Wpthemedesigner and has been converted to blogger by Anshul. This template was unique because it has gallery style with auto readmore with thumbnail, two main columns for post body but with minimalist colour that will make your blog loading more faster.
Preview | Download
feature of this template :
* Blogger Header Splitted Into Two Sections
* Horizontal Navigational Menu Links
* Automatic Read More Hack With Thumbnail
* Search Box For Blog
* Swap Title Hack For Blogger
* Three Column Footer
* Embed Comment Form
* Magazine Style Widgets
* Hidden Navbar Layout
Follow step below to install it.
1. Basic Installation
Installation.
Header Image
Upload your header image from header widget inside the blogger layout.That is widget at top left of page elements by hitting Edit Button.
Advertisement Widget
Add code below and replace the red code with 468x60 ads banner code.
<table border="0" width="500" background="http://i36.tinypic.com/2s7uteq.jpg" height="81" align="center">
<tr><td width="500" height="77">
<div align="center">
<!----- Adsense Codes Here------->
</div></td></tr>
</table>
Menu Links.
Find code below and edit it.
<div id='menu'>
<ul>
<li><a href='/'>Home</a></li>
<li><a href='http://anshuldudeja.blogspot.com/search/label/Blogger%20Widget'>Widgets</a></li>
<li><a href='http://anshuldudeja.blogspot.com/search/label/Blogger%20Hack'>Hacks</a></li>
<li><a href='http://anshuldudeja.blogspot.com/search/label/Blogger%20Tutorial'> Tutorials</a></li>
<li><a href='http://anshuldudeja.blogspot.com/search/label/Blogger%20Templates'>Templates</a></li>
<li><a href='http://anshuldudeja.blogspot.com/2008/11/contact-us.html'>Contact</a></li>
</ul>
</div>
SubMenu Links
Same as step above just edit links below.
<div id='submenu'>
<ul>
<li><a href='/'>Home</a></li>
<li><a href='http://anshuldudeja.blogspot.com/search/label/Blogger%20Widget'>Widgets</a></li>
<li><a href='http://anshuldudeja.blogspot.com/search/label/Blogger%20Hack'>Hacks</a></li>
<li><a href='http://anshuldudeja.blogspot.com/search/label/Blogger%20Tutorial'> Tutorials</a></li>
<li><a href='http://anshuldudeja.blogspot.com/search/label/Blogger%20Templates'>Templates</a></li>
<li><a href='http://anshuldudeja.blogspot.com/2008/11/contact-us.html'>Contact</a></li>
</ul>
</div>
That's all happy downloading.
Jul 18, 2009
Mahusay Free Premium Magazine Template

Mahusay is originally free premium Wordpress Theme create by Paddsolutions and has been converted to blogger by Free Blogger Template. This theme come with 2 column Magazine style, elegant design, slide feature, and 2 element under post. Slideshow Post Feature are automatic update from your latest post.
Preview | Download
1. Basic Installation
Instalations Guide :
Go to "Edit HTML"
Find The Code below and replace the red/blue code with your own
Javascript Hosting
Find this code and replace with your own host.
<script src='http://WWW.YOUROWNHOSTING.COM/mootools.v1.11.js' type='text/javascript'/>
<script src='http://WWW.YOUROWNHOSTING.COM/jd.gallery.js' type='text/javascript'/>
Twitter Url
Find This Code and replace the red text with your Twitter Url
<a href='http://twitter.com/YOURNAME' id='twitter' title='Twitter'>Twitter</a>
Menu Navigation
Change it with your own.
<ul>
<li class='current_page_item'><a href='/'><span><span>Home</span></span></a></li>
<li class='page_item page-item-39'><a href='#' title='About'><span><span>About</span></span></a></li>
<li class='page_item page-item-28'><a href='#' title='Child Page'><span><span>Child Page</span></span></a></li>
</ul>
Slide Feature with automatic post update
change the red url with your Blog Url and blue Url with your Image Url(background image = 606x225 pixel).
<div class='imageElement'>
<h2><script>var startposts = 0; numposts = 1; var showposttitle = true; showpostdate = false; var showpostsummary = false; var numchars = 0; </script><script src="http://mahusay-fbt.blogspot.com/feeds/posts/default?orderby=published&alt=json-in-script&callback=rp">
</script></h2>
<p><script>var startposts = 0; numposts = 1; var showposttitle = false; showpostdate = false; var showpostsummary = true; var numchars = 150; </script><script src="http://mahusay-fbt.blogspot.com/feeds/posts/default?orderby=published&alt=json-in-script&callback=rp">
</script></p>
<a class='open' href='#' title='Read More'/>
<img class='full' src='http://i606.photobucket.com/albums/tt142/freebloggertemplate/mahusay/image1.jpg'/>
<img class='thumbnail' src='http://i606.photobucket.com/albums/tt142/freebloggertemplate/mahusay/image1.jpg'/>
</div>
<div class='imageElement'>
<h2><script>var startposts = 1; numposts = 2; var showposttitle = true; showpostdate = false; var showpostsummary = false; var numchars = 0; </script><script src="http://mahusay-fbt.blogspot.com/feeds/posts/default?orderby=published&alt=json-in-script&callback=rp">
</script></h2>
<p><script>var startposts = 1; numposts = 2; var showposttitle = false; showpostdate = false; var showpostsummary = true; var numchars = 150; </script><script src="http://mahusay-fbt.blogspot.com/feeds/posts/default?orderby=published&alt=json-in-script&callback=rp">
</script></p>
<a class='open' href='#' title='Read More'/>
<img class='full' src='http://i606.photobucket.com/albums/tt142/freebloggertemplate/mahusay/image2.jpg'/>
<img class='thumbnail' src='http://i606.photobucket.com/albums/tt142/freebloggertemplate/mahusay/image2.jpg'/>
</div>
<div class='imageElement'>
<h2><script>var startposts = 2; numposts = 3; var showposttitle = true; showpostdate = false; var showpostsummary = false; var numchars = 0; </script><script src="http://mahusay-fbt.blogspot.com/feeds/posts/default?orderby=published&alt=json-in-script&callback=rp">
</script></h2>
<p><script>var startposts = 2; numposts = 3; var showposttitle = false; showpostdate = false; var showpostsummary = true; var numchars = 150; </script><script src="http://mahusay-fbt.blogspot.com/feeds/posts/default?orderby=published&alt=json-in-script&callback=rp">
</script></p>
<a class='open' href='#' title='Read More'/>
<img class='full' src='http://i606.photobucket.com/albums/tt142/freebloggertemplate/mahusay/image3.jpg'/>
<img class='thumbnail' src='http://i606.photobucket.com/albums/tt142/freebloggertemplate/mahusay/image3.jpg'/>
</div>
<div class='imageElement'>
<h2><script>var startposts = 3; numposts = 4; var showposttitle = true; showpostdate = false; var showpostsummary = false; var numchars = 0; </script><script src="http://mahusay-fbt.blogspot.com/feeds/posts/default?orderby=published&alt=json-in-script&callback=rp">
</script></h2>
<p><script>var startposts = 3; numposts = 4; var showposttitle = false; showpostdate = false; var showpostsummary = true; var numchars = 150; </script><script src="http://mahusay-fbt.blogspot.com/feeds/posts/default?orderby=published&alt=json-in-script&callback=rp">
</script></p>
<a class='open' href='#' title='Read More'/>
<img class='full' src='http://i606.photobucket.com/albums/tt142/freebloggertemplate/mahusay/image1.jpg'/>
<img class='thumbnail' src='http://i606.photobucket.com/albums/tt142/freebloggertemplate/mahusay/image1.jpg'/>
</div>
<div class='imageElement'>
<h2><script>var startposts = 4; numposts = 5; var showposttitle = true; showpostdate = false; var showpostsummary = false; var numchars = 0; </script><script src="http://mahusay-fbt.blogspot.com/feeds/posts/default?orderby=published&alt=json-in-script&callback=rp">
</script></h2>
<p><script>var startposts = 4; numposts = 5; var showposttitle = false; showpostdate = false; var showpostsummary = true; var numchars = 150; </script><script src="http://mahusay-fbt.blogspot.com/feeds/posts/default?orderby=published&alt=json-in-script&callback=rp">
</script></p>
<a class='open' href='#' title='Read More'/>
<img class='full' src='http://i606.photobucket.com/albums/tt142/freebloggertemplate/mahusay/image2.jpg'/>
<img class='thumbnail' src='http://i606.photobucket.com/albums/tt142/freebloggertemplate/mahusay/image2.jpg'/>
</div>
Feedburner Subscriber
<input name='url' type='hidden' value='http://feeds.feedburner.com/~e?ffid=YOURFEEDBURNERID'/>
Enjoy and thanks to Free Blogger Template for converting this great template.
Jul 2, 2009
Gamma Ray Blogger Template

Gamma Ray is 2 Columns with magazine style blogger template and right sidebar. Gamma Ray Blogger Template is a modern visual, interactive and sober, page elements to flashy, innovative and personalized blogger template. The template was originally designed by Insight your Blogger. The feature of this template: Menu and Auto Search, Automatic "Read More" with thumbnail, Custom date, Visual uncommon in the post title and sidebar and title of the blog, Slideshow, social networks already installed and many more.
Installation : Later +_+
Demo | Download
Jun 25, 2009
Conservative American Blogger Templates

Conservative American Blogger Templates is coverted by Zonacerebral from wordpress American Conservative theme designed by Jeremy Buff. It's 2 columns with dark background template.
The feature :
* 2 Columns
* Black
* Elegant
* Rounded corners
* White
* Twitter widgwts
* Slide Show
Preview | Download
Jun 24, 2009
Dreamy Blogger Templates
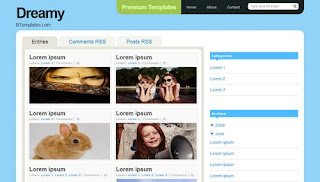
Dreamy Blogger Templates is a simple gallery style blogger template, organized, eye-candy, blue, and minimalistic. The good feature is automatic summary of your posts, and automatic thumbnail of post images as well. Dreamy Blogger Templates has been bloggerized by Dante.
Features:
* Gallery Style
* Cool Navigation Bar
* Organized
* Blue
* Custom comments, Blockquotes and Lists
* Automatic Thumbnail
* Automatic Post Summary
Preview | Download
Jun 14, 2009
Proximus Blogger Template

Proximus Blogger Template is new magazine style blogger template designed and bloggerized by BloggerThemes. It's 2 columns with right sidebar. The ads spot in the top header and on the right side. The color is brown, black and white. Also bookmarks and search button supported.
Demo | Download
Jun 6, 2009
Fresh Magazine 1.1 Blogger Templates
New magazine style blogger template, released by NdyTeeN. It's another mind blowing magazine style blogger templates with simple colour. Just white and red. Featured slide show on top. This is 2 columns blogger template with right sidebar. Ads placement also included. Check the demo for live show.

Installation For Fresh Magazine 1.1 Blogger Templates
1. Basic Installation
2. Setting Header Images.

The PSD images doesn't included in the download file. You must make your header image with photoshop or other similiar image editor program. The image size must be 468 width x 107 height. Now upload it to your header from your blogger dashboard.
get it?
3. Setting up the Advertisement Banner

Go to Your Dashborad >> Layout >> Edit HTML >> Expand Widget Templates.
Now find this code :
<div class='headerright'>
<a href='#'><img src='https://blogger.googleusercontent.com/img/b/R29vZ2xl/AVvXsEjZAiVFWye0uWmdyRnxe6-dN_Gqz-rLteJqKFPxw1wU3PsDFZ9cqe4BJDLsLPc09xVahjuY7MdEr-OhVGA9rCPaD8picK0nFUv3nXvcXwkMY3Zx8ax9DMgRoLZbDKLVW_0soUNn92PAHm8/s320/topbanner.gif' style='width: 468px; height: 60px;'/></a>
</div>
Now Change the red text to your own banner or maybe google adsense code.
3. Setting Up the Top Tab Menu Navigation
Find code below in your template.
<div id='NavbarMenuleft'>
<ul id='nav'>
<li><a expr:href='data:blog.homepageUrl'>Home</a></li>
<li>
<a href='#'>Sample Page</a>
<ul>
<li>
<a href='#'>Sub Page #1</a>
<ul>
<li><a href='#'>Sub Sub Page #1</a></li>
<li><a href='#'>Sub Sub Page #2</a></li>
<li><a href='#'>Sub Sub Page #3</a></li>
</ul>
</li>
<li><a href='#'>Sub Page #2</a></li>
<li><a href='#'>Sub Page #3</a></li>
<li><a href='#'>Sub Page #4</a></li>
<li><a href='#'>Sub Page #5</a></li>
</ul>
</li>
<li><a href='#'>Sample Post</a></li>
<li><a href='#'>Blog Page</a></li>
</ul>
</div>
Now Change it with your own.
4. Setting Navigation menu just below top tabs
Go to Your Dashborad >> Layout >> Edit HTML >> Expand Widget Templates.
Find Code below.
<div id='subnavbar'>
<ul id='subnav'>
<li>
<a href='#'>Community Events</a>
<ul>
<li>
<a href='#'>Sub Category #1</a>
<ul>
<li>
<a href='#'>Sub Sub Category #1</a>
</li>
<li>
<a href='#'>Sub Sub Category #2</a>
</li>
<li>
<a href='#'>Sub Sub Category #3</a>
</li>
</ul>
</li>
<li>
<a href='#'>Sub Category #2</a>
</li>
<li>
<a href='#'>Sub Category #3</a>
</li>
</ul>
</li>
<li>
<a href='#'>Conferences</a>
</li>
<li>
<a href='#'>Get Connected</a>
</li>
</ul>
</div>
That's the code now change it with your own.
5. Setting The slide show.
Go to Your Dashborad >> Layout >> Edit HTML >> Expand Widget Templates.
Find Code below.
<div class='slide'>
<h2><a href='POST-LINK-HERE' title='Superbowl'>Superbowl</a></h2>
<span class='slmet'> Posted by NdyTeeN On Mei - 25 - 2009 </span>
<p>Lorem ipsum dolor sit amet, consectetuer adipiscing elit. Quisque sed felis. Aliquam sit amet felis. Mauris semper, velit semper laoreet dictum, quam diam dictum urna, nec placerat elit nisl in quam. Etiam augue pede, molestie eget, rhoncus at, convallis ut, eros. Aliquam pharetra. Nulla in tellus eget odio sagittis blandit. Maecenas at nisl. Nullam lorem mi, eleifend a, fringilla vel, semper at, ligula. Mauris eu wisi. Ut ante dui, aliquet nec, congue non, accumsan sit amet, lectus. Mauris et mauris. ...</p>
<img alt='' src='http://web2feel.com/monezine/wp-content/uploads/2008/12/stad.jpg'/>
</div>
Now You just see 5 code like that. Change it with your own. The format is below.
<div class='slide'>
<h2><a href='POST-LINK-HERE' title='Your Title'>Title</a></h2>
<span class='slmet'> Posted by </span>
<p>Your Summary Text. ...</p>
<img alt='' src='Your Image Url'/>
</div>
It's all done. Still have another problem? Then contact the author or you can ask me below and i'll try to solve your problem. Happy Blogging.
Apr 7, 2009
Comfy Magazine Style Blogger Template
An original magazine style wordpress theme designed by deluxetheme has been converted to blogger by technolizard. I saw this awesome template when i was blogwalking around and decide to share it with you. It's called Comfy Magazine Blogger Template. Has 2 column, white and blue and lot of feature included. it has the perfect place for your advertising program too.

Feature :
* Post and blog title swap For better SEO.
* Yahoo Smilies In Comment Form
* Read more script
* Related Post Widget
* Retweet Button
* Page Navigation Like wordpress
* Built in search bar.
Basic Installation
Apr 1, 2009
Rebel Magazine Blogger Template
Another excellent magazine template designed by WPThemeDesigner, called Rebel Magazine. Simple with black and white with magazine style. It has been converted to blogger by themelib.
* Two columns with right sidebar
* Good design with magazine style
* Built-in RSS feed
* Built-in search box
* Nice navigation tab
* Ad boxes ready (125×125)
* Google Adsense ready (300×250 rectangle, 250×250 square)

Installation For Rebel Magazine Blogger Template
1. Basic Installation
2. Top Navigation Setting
Find code below and change the link with your own.
<li><a expr:href='data:blog.homepageUrl'>Home</a></li>
<li><a href='http://blogger.com'>Blogger</a></li>
<li><a href='http://themelib.com'>ThemeLib</a></li>
3. Setting 125×125 Ad Boxes Section
Find code below and use your own Ads
<div class='ads'>
<a href='http://themelib.com/go/onetheme' target='_blank'><img alt='' src='http://i286.photobucket.com/albums/ll96/themelib/onetheme-ad.gif'/></a>
<a href='http://themelib.com/go/omnitheme' target='_blank'><img alt='' src='http://i286.photobucket.com/albums/ll96/themelib/omni-ad.jpg'/></a>
<a href='http://themelib.com/go/premiumthemes' target='_blank'><img alt='' src='http://i286.photobucket.com/albums/ll96/themelib/premiumthemes-ad.png'/></a>
<a href='http://themelib.com/go/revolutiontheme' target='_blank'><img alt='' src='http://i286.photobucket.com/albums/ll96/themelib/revolution-ad.jpg'/></a>
</div>
All done. Happy blogging.
Mar 19, 2009
Visionary Reloaded Blogger Template
Visionary Reloaded Blogger Template is adaptation from wordpress. Original design by Justin Tadlock and was bloggerized by ITMag Blogger Templates. It has 3 columns, tabbed menu, navigation links and many more.
Features :
* 3 Columns
* Tabbed Menu Category
* Navigation Links
* White Backgrounds
* Fully widgetized

Installation For Visionary Reloaded
1. Setting Navigation Links
Find code below on your edit HTML area and you can add as many links you want
<!-- BEGIN TOP-NAV / FEEL FREE TO ADD MORE LINKS TO THIS PAGE -->
2. Top Navigation Links
Find This line
<!-- BEGIN MAIN-NAV.PHP -->
and after that you will find many links like this
<!-- To show "current" on the About Page -->
<li>
<a href='/' title='About'><span>About</span></a></li>
And there must be much links, so you can replace, remove or add new links there.
3. Setting up the Tabs Menu
Find code below and edit it as you want.
<!-- (TABS) -->
<div class='domtab'>
<!-- Tabs titles -->
<ul class='domtabs'>
<li><a href='#tabone'>Weather</a></li>
<li><a href='#tabtwo'>Live Web Cams</a></li>
<li><a href='#tabthree'>Youtube Fav</a></li>
<li><a href='#tabfour'>tab4</a></li>
</ul>
That's all done. Happy Blogging.
Subscribe to:
Posts (Atom)


